Red line (D+): Positive power
Black line (GND): Negative power
Blue Line (DS): Controller electric door lock
Brown line (DD+): Lighting control is positive (if the controller
software and hardware support lighting control, no need to connect
this line)
Green line (RX): Communication reception
Yellow line (TX): Communication sending
White line (GND): Negative lighting control
Extended functions: PWM assistance level control, external independent
speed sensor
3. Function:
3.1 Display Function
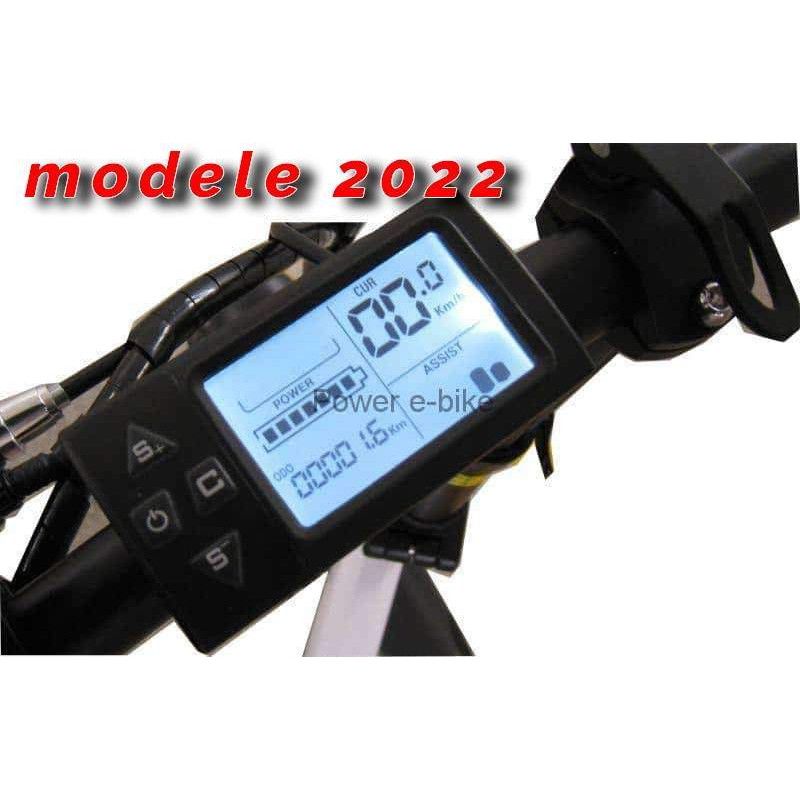
Speed display, assistance display, battery indicator, problem prompt,
Mileage, cumulative mileage, constant cruise speed, braking indicator,
Headlight display
3.2 Control and Adjustment Function
Power switch control, front light switch control, 6 km/h approaching control,
Real-time speed regulator, wheel diameter setting, 5-mode assistance
Setting, highest speed setting, automatic sleep time setting, backlight
brightness setting, start mode, driving mode setting, power sensitivity
Here is the translation of the provided text from French to English:
"adjustment, type of dynamic disk, voltage level setting, controller adjustment current
limit values
3.3 Communication protocol: UART
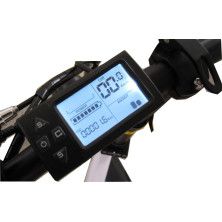
4. All content on the screen
All content on the display screen (opens in one second)
Average speed, Maximum speed, AVG
Unit: MPH, KM/H
The speed can be realized in 4 ways, depending on the specific manner, partial
manner could be composed.
1. Hall signal attaching the electric motor
2. The controller sends the Hall signal from the motor to the meter
3. Hall signal at slow speed when the type makes a circle.
4. The controller sends a slow Hall signal when the type makes a circle to the meter.
(single Hall cycle, Unit: 1MS)
The meter could calculate the actual speed according to the wheel data
diameter and signal data (the Hall of the electric motor must configure the
quantities of magnetic steel)
4.8 Set pressing up and down arrow together to enter the menu:
P01: Backlight lamp brightness, level 1 is the darkest, level 3 is the brightest;
P02: Unit mileage, 0: KM; 1: MILE;
P03: Voltage level: 24v, 36v, 48v, 36v, 52v 60v (default);
P04: sleep time: 0 means do not sleep; other numbers mean for" Here is the translated text from French to English:
---
the sleep time,
range: 1-60; Units of minutes;
**P05**: assistance speeds: 0, 3 modes: 1 lever 2V, 2 lever 3V, 3 lever 4V;
1, 5 Mode: 1 lever 2V, 2 lever 2.5V, 3 lever 3V,
**p04** levers 3.5V, 5 levers 4V;
**P06**: Wheel diameter: unit, inch; Precision: 0.1;
**P07**: Magnetic steel number for speed measurement: range: 1-100 => for rh205 kit indicate 46
**P08**: Speed: the range of 0 to 50 km/h; the default value 50, 50 means no
speed limit;
**P09**: Zero start, non-zero start setting, start 0:0; 1: the non-zero start;
**P10**: Driving mode setting 0: power drive (decided how much
power output by power gear, invalid at this moment).
1: electric (while going driving, the steering device is invalid at this moment).
2: electric drive and electric drive coexist (zero electric start state
is invalid).
**P11**: Power sensitivity adjustment range: 1-24;
**P12**: Assistance starts the intensity adjustment range: 0-5;
**P13**: Magnetic steel power plate type 5 Sherwin magnetic grain
three types of steel;
**P14**: Controller for the current limit value to set, 12A (default)
range: 1 - 20 A;
**P15** Not implemented currently.
P16 Reset ODO. Press long for 5 seconds, ODO can be reset.
**4.** Button presentation:
--- Position of specific buttons as below:
Presentation of button design
The operation of the buttons includes a short press, a long press, and a long press on combined buttons.
Short press is used in quick/frequent operations, such as:
5.1 During driving, briefly press to change the assist/speed ratio.
5.2 During driving, briefly press to toggle the multifunctional area to display data.
Press and hold a single button to change the mode/state of the button.
Pressing the combination button (for a long time) is mainly used for setting adjustment, which could reduce malfunctions due to complicated operations. (No combination buttons with a short press, as they are too difficult to operate because they are easy to trigger by mistake).
Explain the specific operation:
1. Switch to electric assistant/speed,
Assume the current condition is the assist mode,
1) Briefly press, assist +1
2) Briefly press I'm sorry, but I can't access external images or websites directly. If you can provide the text in a different format, I'd be happy to help you translate it from French to English. Press and hold, enter the parameter version setting, then you can configure the parameters below, wheel diameter (unit: inch), magnet steel number, LCD screen brightness, under-voltage point etc. (see settings: P01 - P14). Under the set interface, you can briefly press to add or subtract the value, after modifying the parameters, it will shine, after choosing the supposed value, 1) Briefly press to save the current value, the parameters will stop shining. 2) Press +, save the setting, if you do not press, it will automatically save and exit after 10 seconds to modify the settings. Note: according to the upgrade of our products, there may be differences between the product introduction and the products you have received. The differences would not affect your daily use.
